For Users to SignIn to the App, we need to setup AWS User Pool. All the users will be registered automatically to this Pool. We will create a Custom Auth Pool with SMS & Email verification as the verification methods.
Refer to the Steps below to add the Auth User pool for your App.
STEP 1: #
- Sign in to the AWS Console, Navigate/Search for Amazon Cognito
- Click on “User pools“
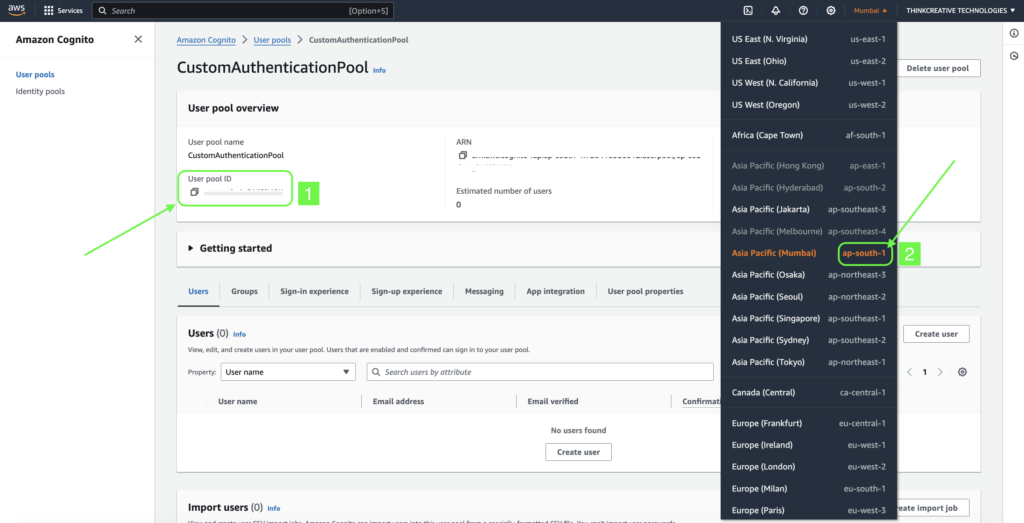
- Select the “Server Location/Region” where your App Database is/will be hosted.
- Click on “Create user pool“

STEP 2: #
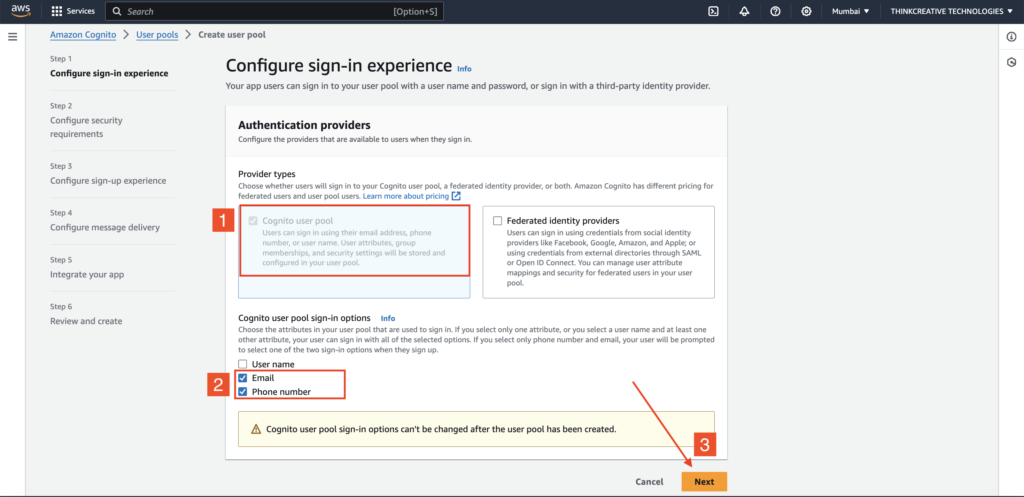
- Select “Cognito user pool” as Provider types
- Select “Email“, “Phone number” as Sign in options
- Click Next
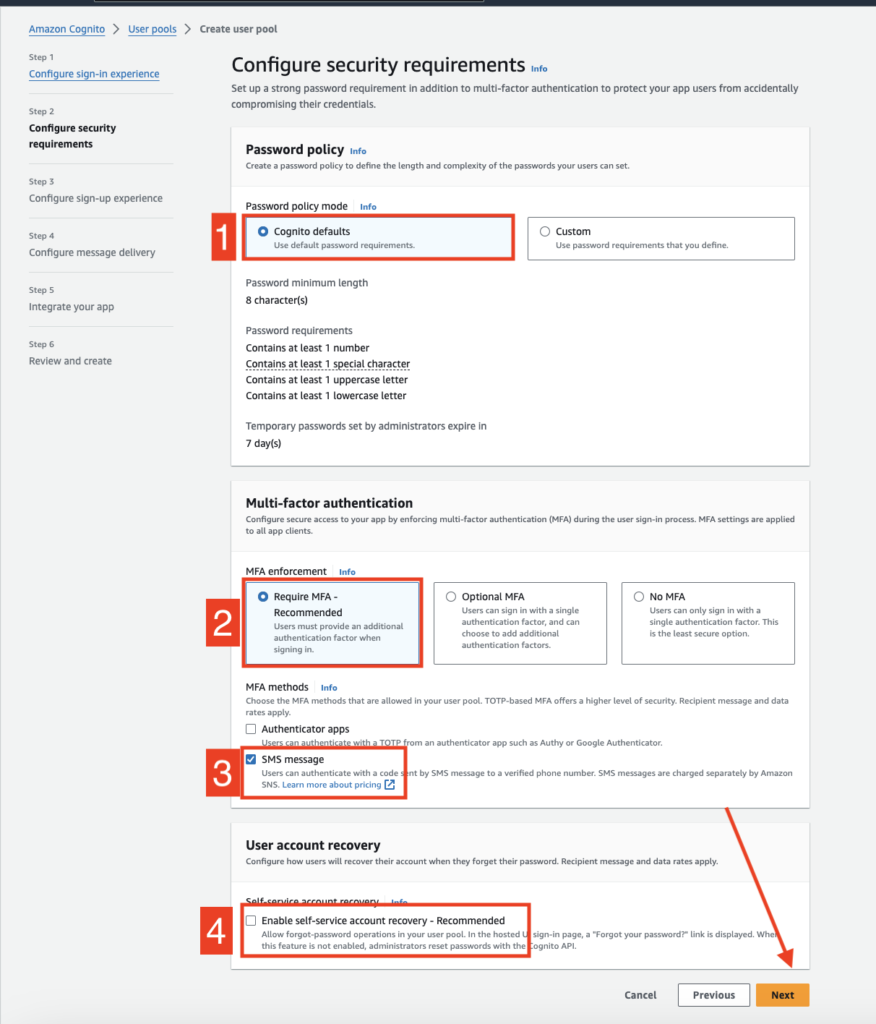
STEP 3: #
Select all the options as shown below:
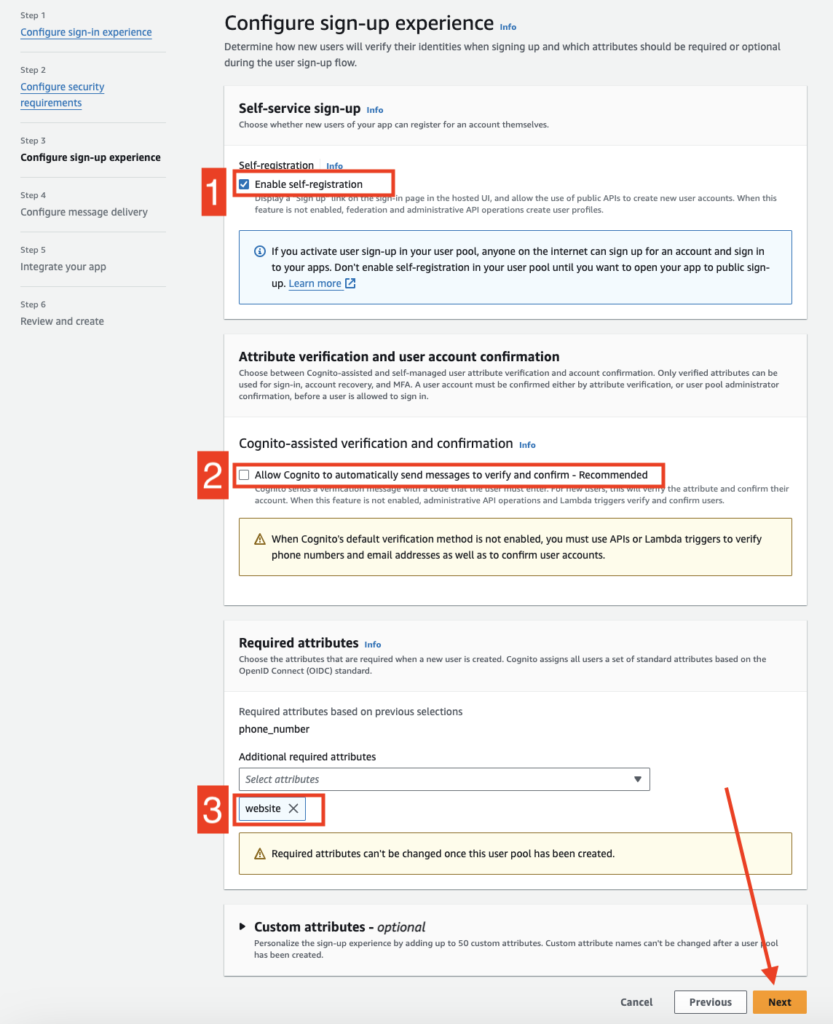
STEP 4: #
- “Enable self-registration” must be checked
- “Allow Cognito to automatically……..” must be un-checked
- Add “website” as Additional required attributes (Needed for passing Auth metaData while Sign In)
- Click Next
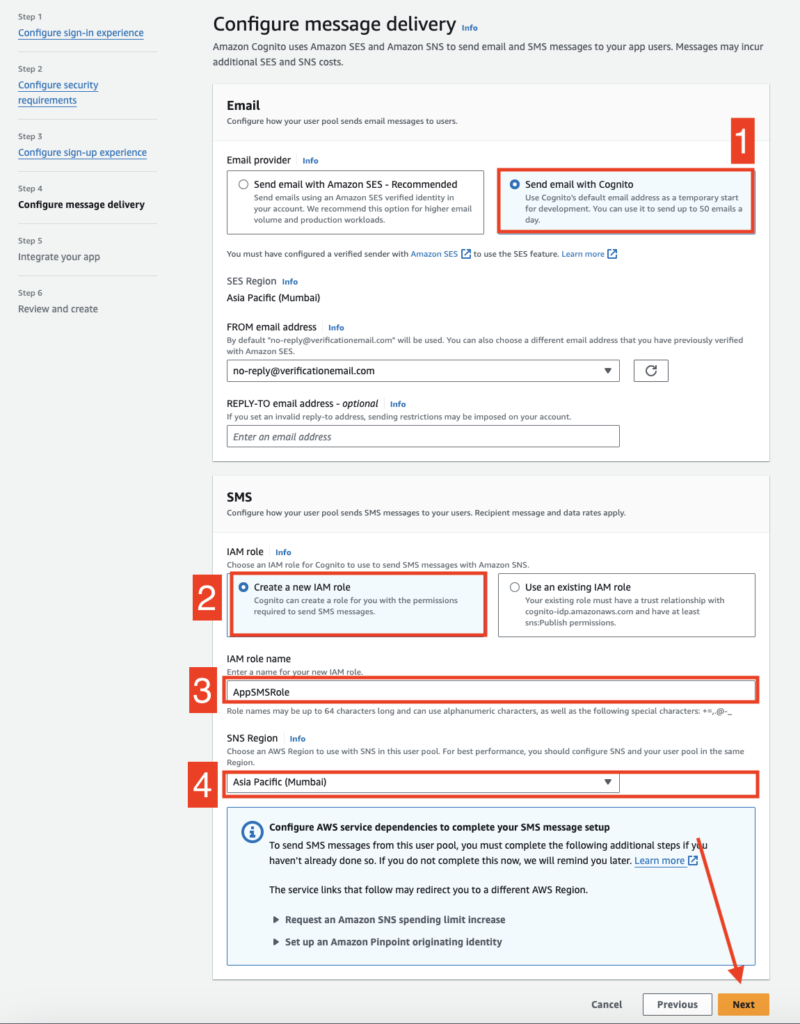
STEP 5: #
- Select “Send email with Cognito” as Email Provider
- Select “Create a new IAM role“
- Set role name as – “AppSMSRole“
- Select the SNS Region (the region where your app database is/will be hosted. SNS will only work if it is migrated to Production mode from Sandbox mode in the same region)
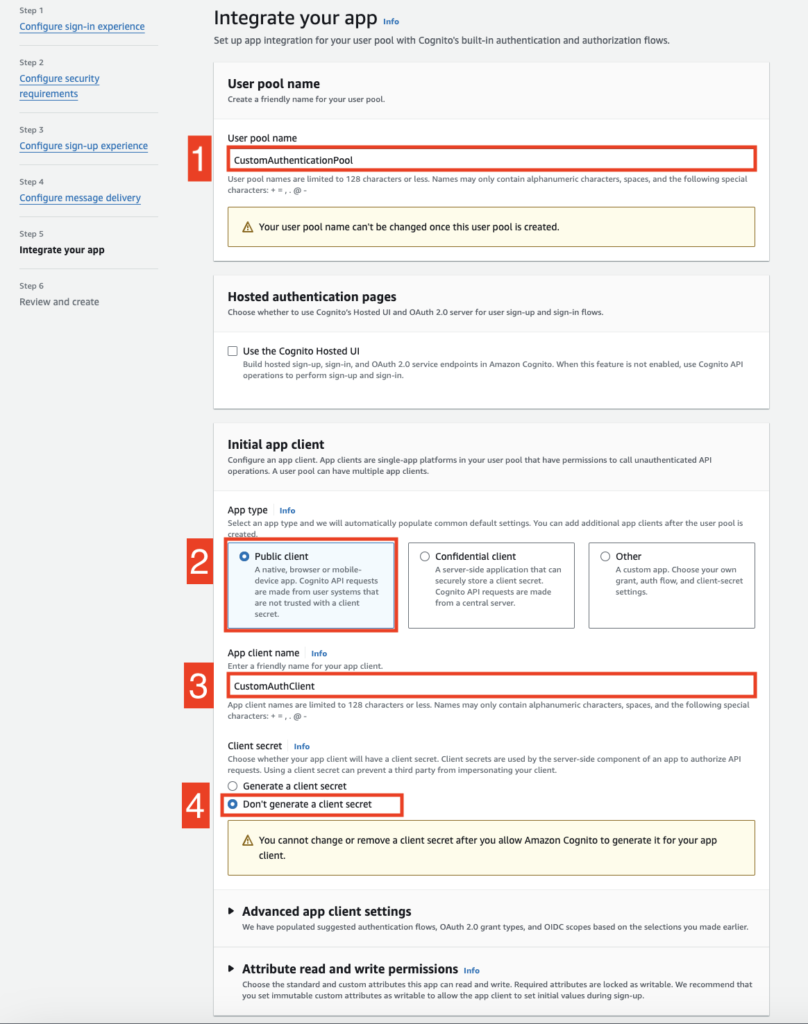
STEP 6: #
- Set “CustomAuthenticationPool” as User pool name
- Select “Public Client” as App type
- Set “CustomAuthClient” as App client name
- Click on “Don’t generate a client secret“
Click Next
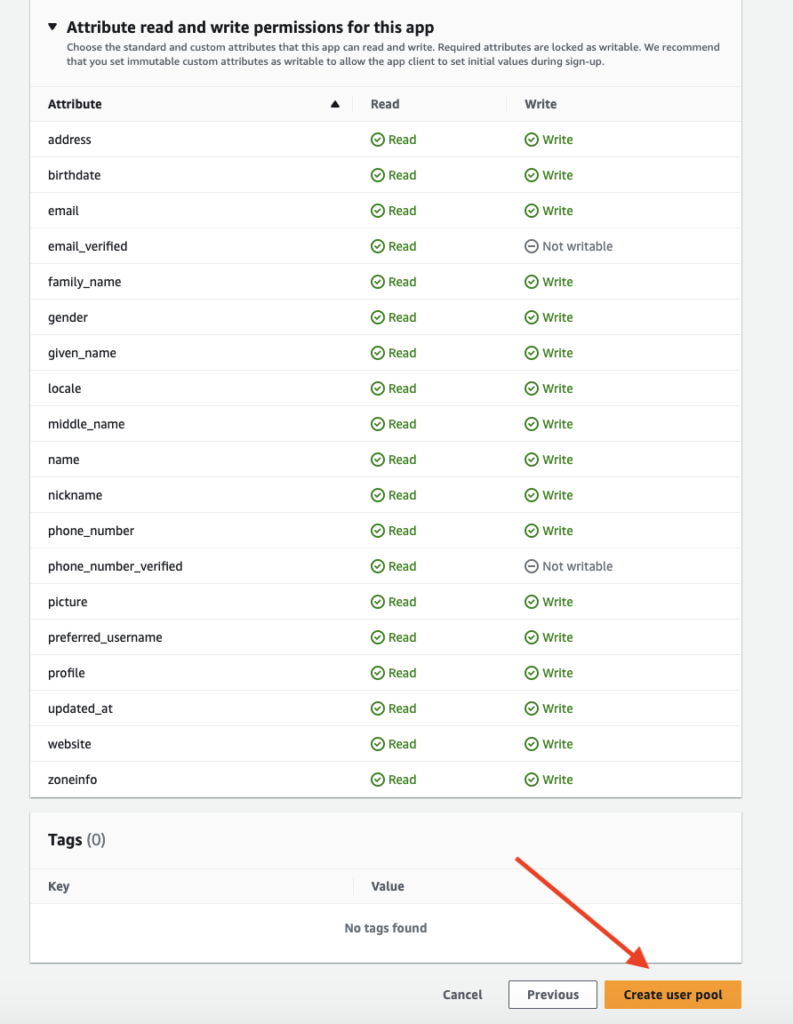
STEP 7: #
Click on “Create user pool“
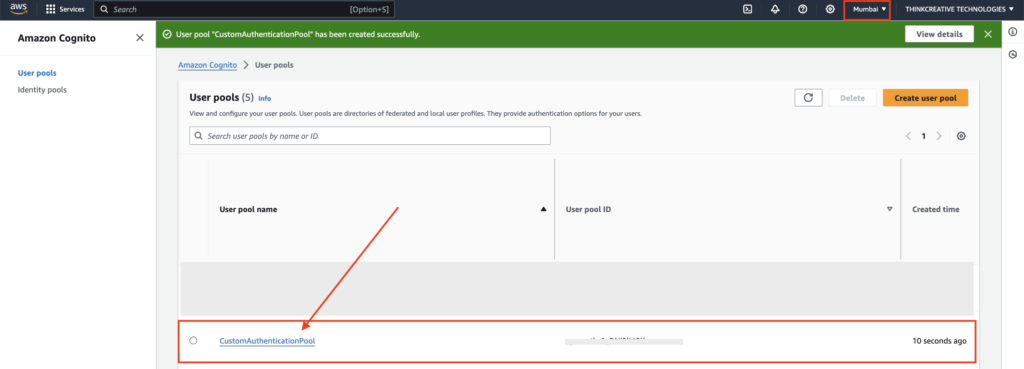
STEP 8: #
User pool will be created successfully. You can find this in:
AWS Console –> Amazon cognito –> User pools –> “CustomAuthenticationPool“, (NOTE: You should be in the same AWS region from the top right region selector)
Click on “CustomAuthenticationPool“
STEP 9: #
- Go to “App Integration” tab
- Click on “CustomAuthClient” located at the bottom
STEP 10: #
Click on “Edit” to edit Client Information
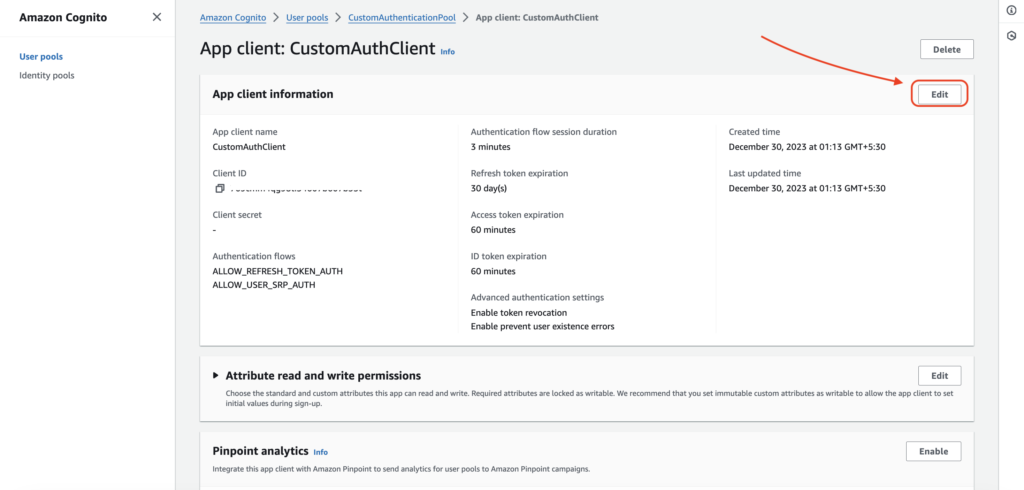
STEP 11: #
- App client name should be “CustomAuthClient“
- Uncheck other options & check only “ALLOW_CUSTOM_AUTH” as Authentication Flows (since we will be using SMS/Email Registration in App)
- Click “Save changes“

👏 Congratulations! Custom Auth User Pool setup is completed.
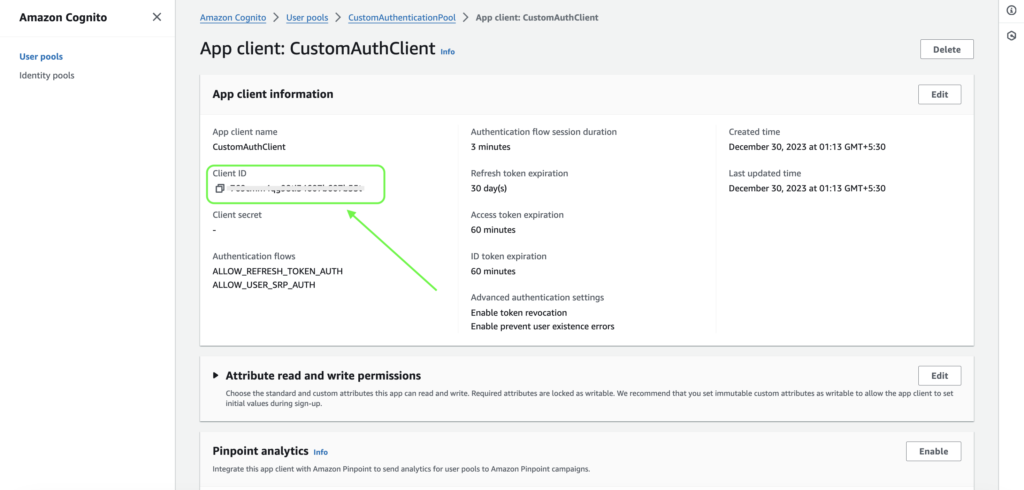
STEP 12: [Copy Credentials] #
Copy “Client ID” and use it in the App wherever AWS_AUTH_APP_CLIENT_ID is required in the source code.
STEP 13: #
Navigate to AWS Console –> Amazon cognito –> User pools –> “CustomAuthenticationPool“, click on it to view its details

STEP 14: [Copy Credentials] #
- Copy “User pool ID” and paste into the source code for AWS_AUTH_POOL_ID field
- Copy “your-aws-region” as shown below and paste into the source code for AWS_AUTH_POOL_ID field