Refer to the Steps below to add the setup Email/SMS authentication
STEP 1: #
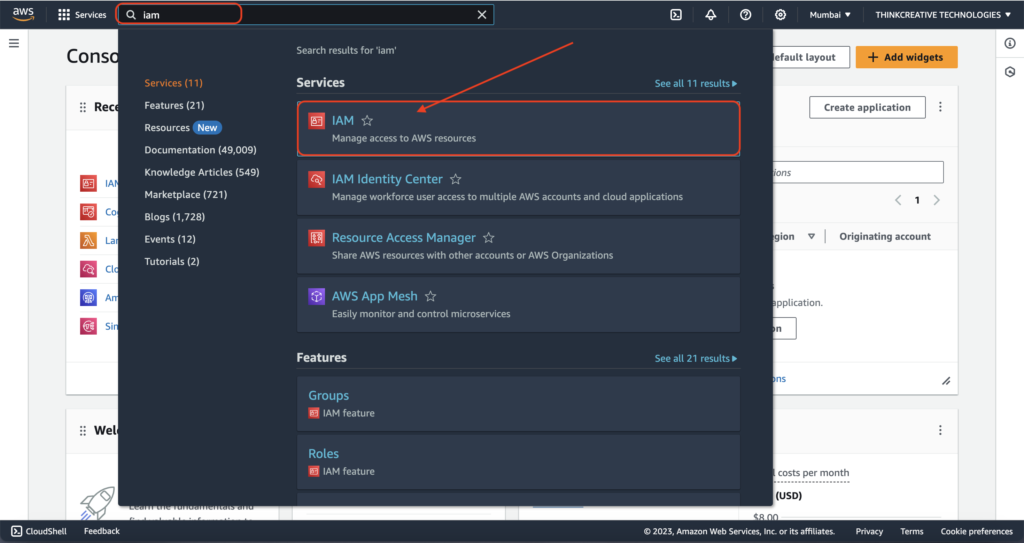
- Sign in to the AWS Console, Navigate/Search for IAM
- Click on “IAM“
STEP 2: #
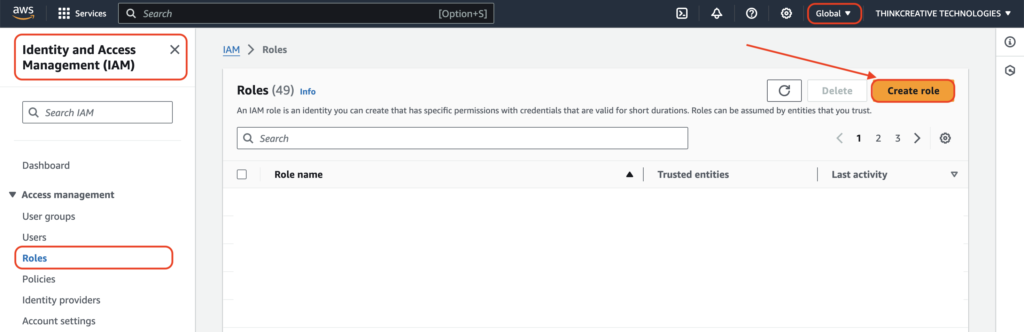
- Click on “Roles” under Access Management tab
- Click on “Create Role” to create a role to allow send SMS/Email.
STEP 3: #
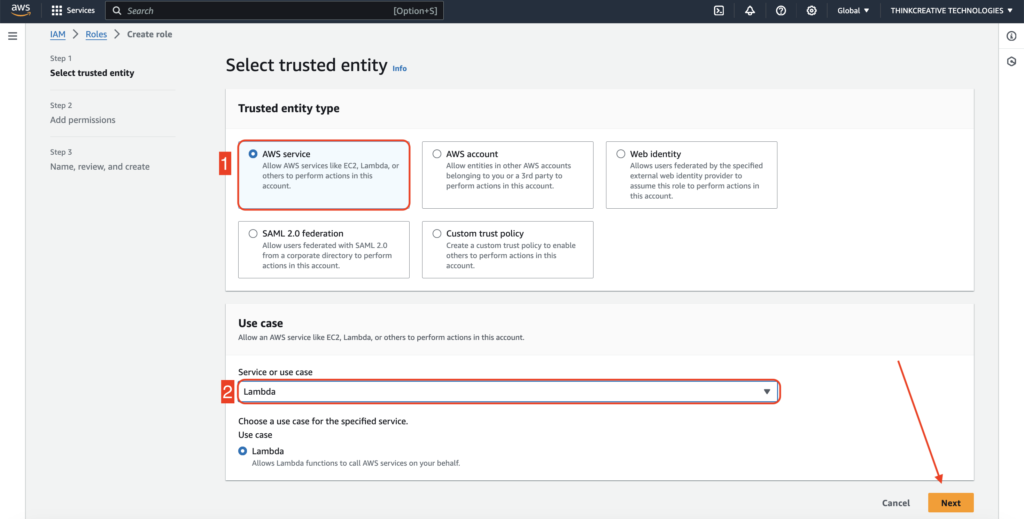
- Select “AWS service” as Trusted Entity type
- Select “Lambda” as Service or use case
Click Next
STEP 4: #
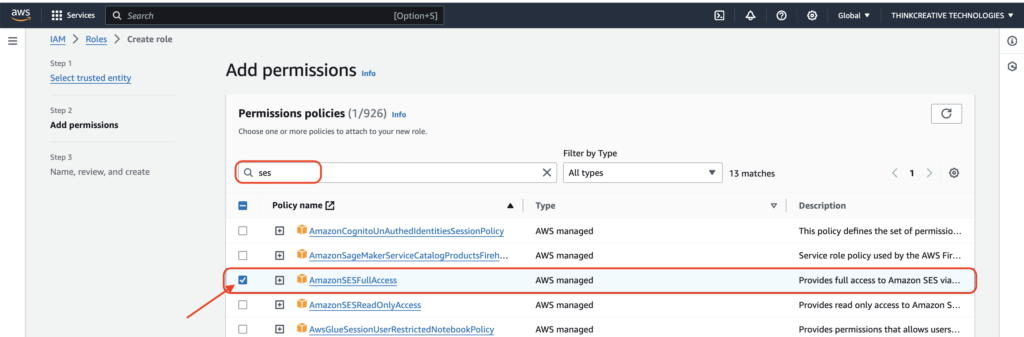
Search for “ses” and check “AmazonSESFullAccess”
STEP 5: #
Search for “sns” and check “AmazonSNSFullAccess”

STEP 6: #
- Set Role name as “smsEmailSendingRole”
- Make sure the Policy Access tab has “AmazonSESFullAccess” and “AmazonSNSFullAccess” enabled as perfomed in the above 2 steps.
Click Create Role
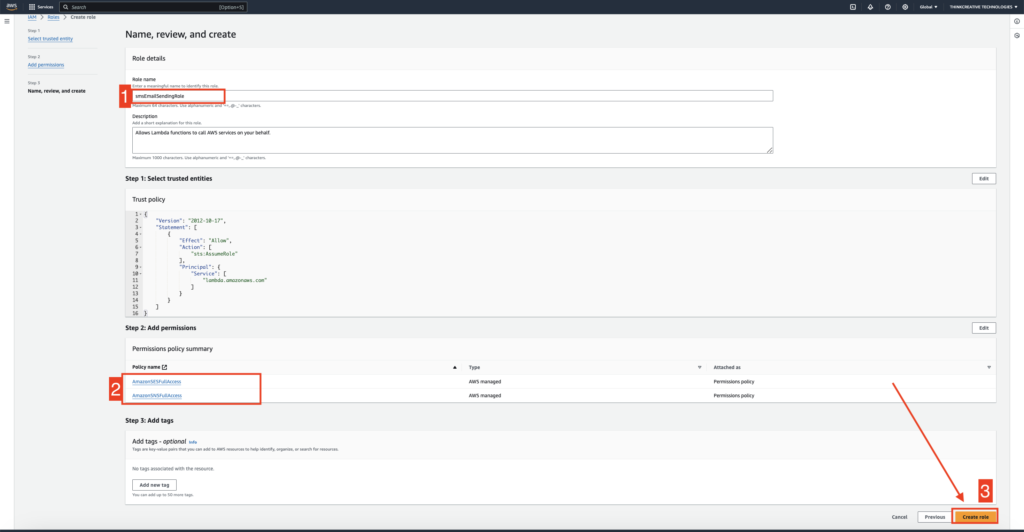
IAM role will be created successfully !
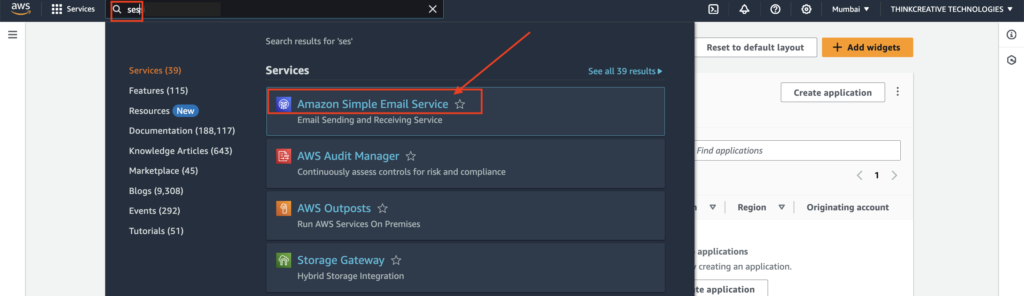
STEP 7: SES setup for Email Verification #
For Users using Email Authentication during Sign In, the Login Verification code to users’ Email will be sent through Amazon SES (Amazon Simple Email Service).
(NOTE: If your App doesn’t have email verification, you can skip these steps)
Sign in to the AWS Console, Navigate/Search for SES, and Click on “Amazon Simple Email Service (SES)“.
SES must be moved to production mode to send verification codes to users.
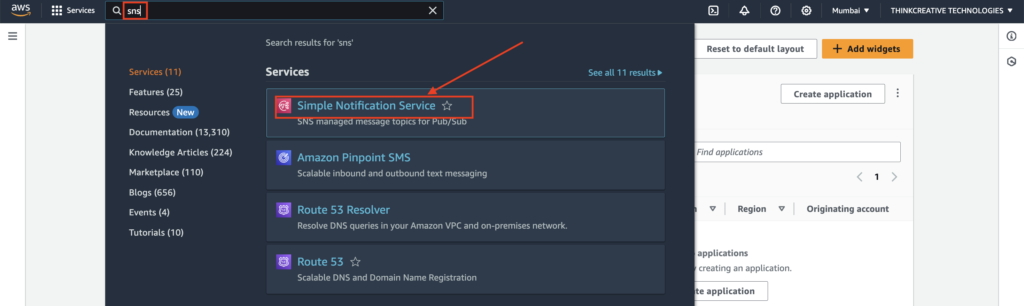
STEP 8: SNS setup for Phone SMS Verification #
For Users using Phone Number Authentication during Sign In, the Login SMS Verification code to users’ Phone will be sent through Amazon SNS (Amazon Simple Notification Service).
(NOTE: If your App doesn’t have Phone SMS verification, you can skip these steps)
Sign in to the AWS Console, Navigate/Search for SNS, and Click on “Amazon Simple Notification Service (SNS)“.
SNS must be moved to production mode to send verification codes to users.