STEP 1: #
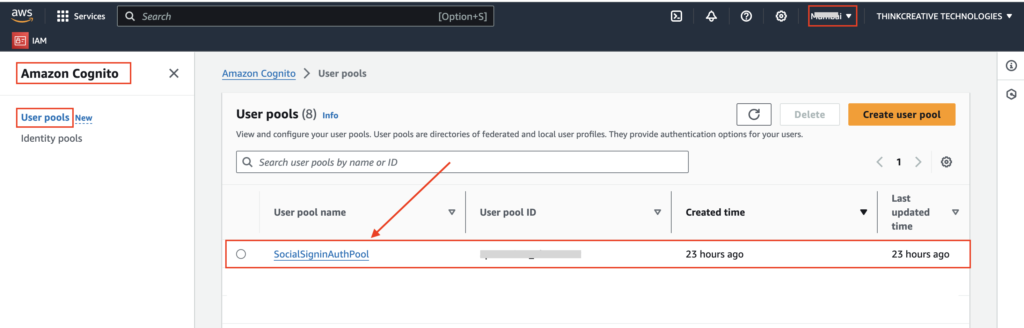
Social SignIn User pool will be created successfully. You can find this in:
AWS Console –> Amazon cognito –> User pools –> Select Region > “SocialSignInAuthPool“, (NOTE: You should be in the same AWS region from the top right region selector)
Click on “SocialSigninAuthPool“
STEP 2: #
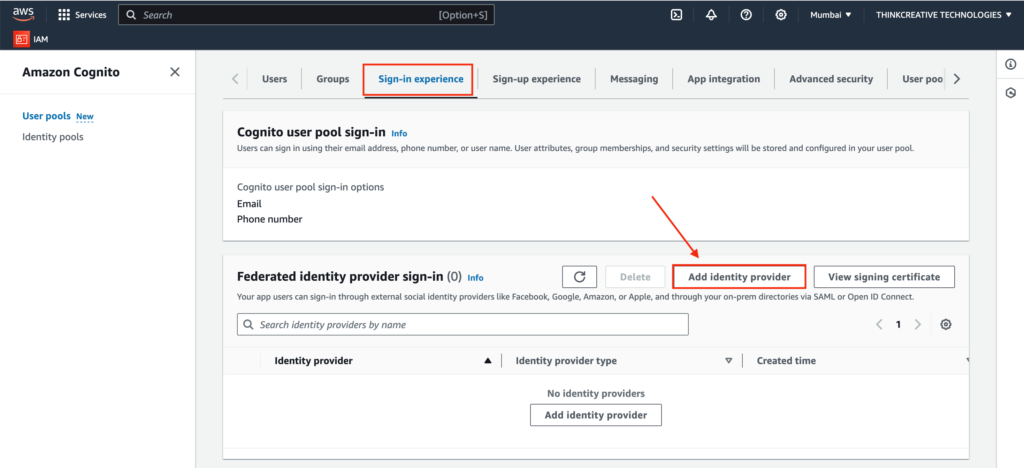
- Go to “Sign-in experience” tab
- Click on “Add identity provider” located at the bottom
STEP 3: #
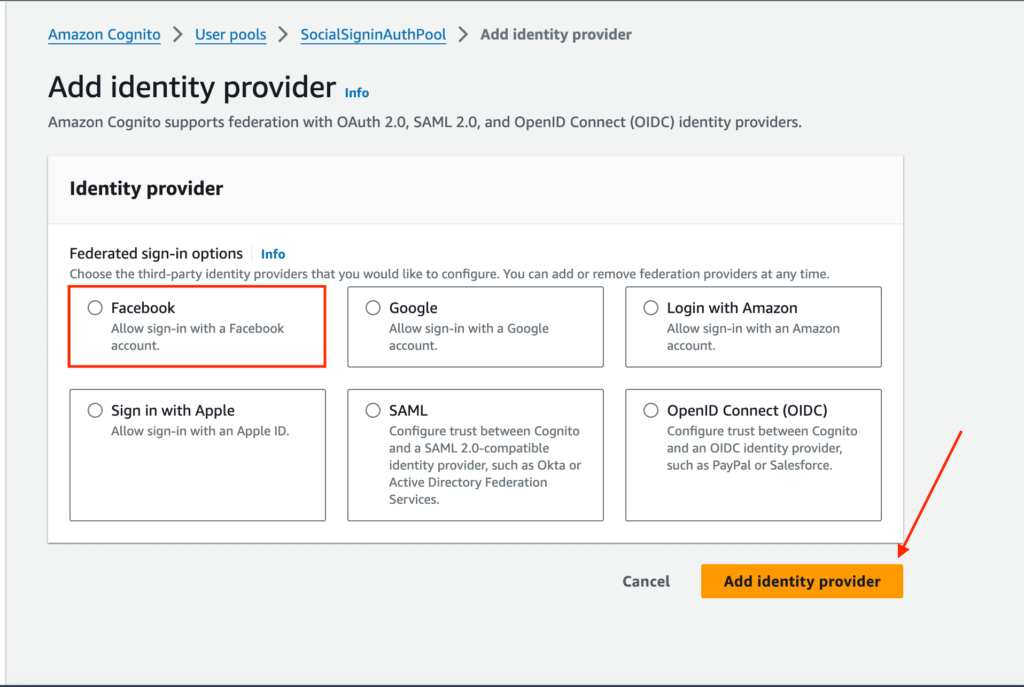
Click on “Facebook” and click “Add identity provider“
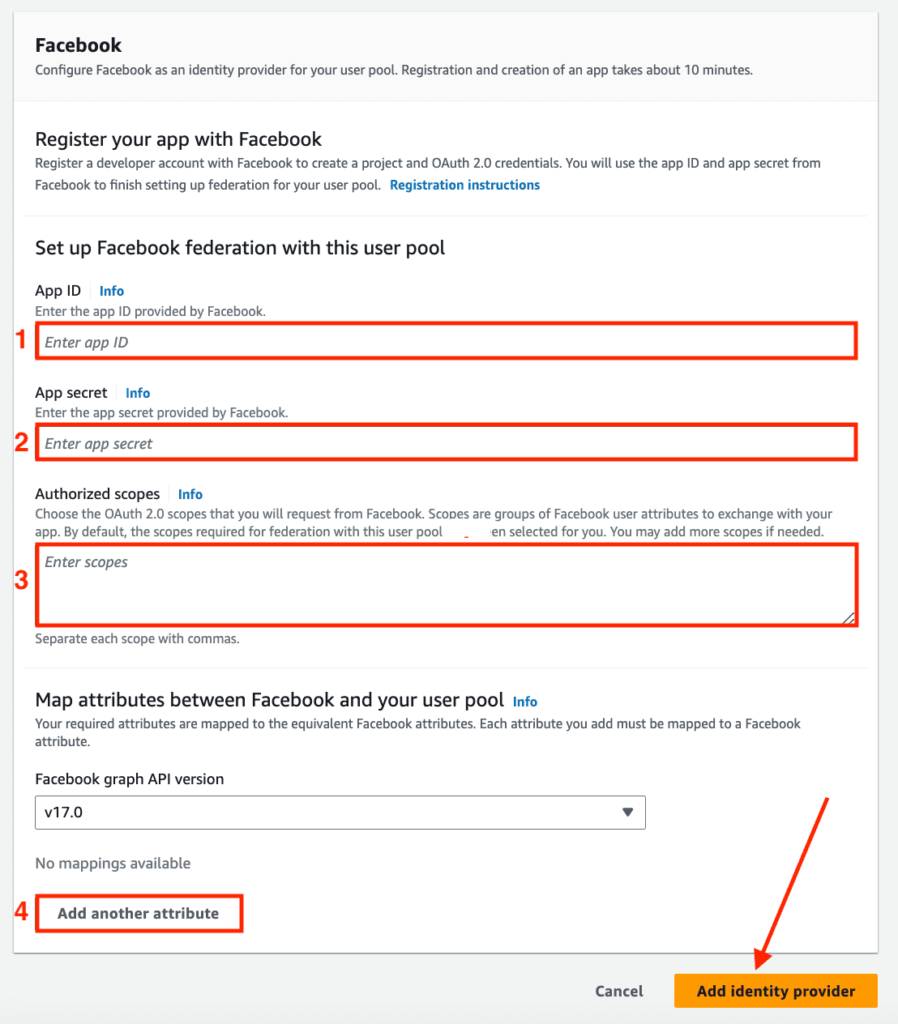
STEP 11: #
Kindly fill out the form as instructed below:
- Paste the App ID generated in Step-XX above
- Paste the App Secret generated in Step-XX above
- Enter these scopes (paste as it is): public_profile, email
- Click on “Add another attribute” to add the following attributes:
| User pool attribute | Facebook attribute |
| name | name |
| username | id |
Click on Add Identity Provider.
👏 Congratulations! Sign in with Facebook setup is completed.
NOTE: Please don’t forget to select the “Facebook” option from the Admin App > Authentication Settings > Authentication Providers so that the SignIn With Facebook Button is visible in the App.